Third Image

Third Image


Fifth image

Fifth image

First slide

First slide

maanantai 21. syyskuuta 2015

Blogin uusi ulkoasu - New layout in the blog


Blogini on siis saanut uuden ja kivemman ulkoasun. Viihdyn hyvin sinisen kanssa ja en siihen sävyyn koskaan kyllästy, joten ihan on oman oloinen ulkoasu. Opin jonkin aikaa sitten mainiosta byHaafner-virkkausblogista, että Bloggerin blogiin voi ostaa tällaisiakin muutoksia ja pienellä budjetilla. Muutama ilta meni muutosta tehdessä ja nyt on tietysti sitten vielä kaikenlaista pientä järjestelemistä ja päivittämistä täällä tehtävänä. 

Mielellään olisin tietenkin käyttänyt kotimaista osaamista, mutta kun en tiennyt mistä sellaista etsiä, niin päädyin sitten kannattamaan aloittelevaa luovan alan yrittäjää Madeline Clinea Yhdysvalloista. Voin lämpimästi suositella Maddien palveluksia, hän oli todella nopea ja luotettava ja teki muutokset blogiini itse sen sijaan, että minun olisi tarvinnut opetella mitään asentamaan. Etsyssä muiden myyjien blogipohjia selatessani ja niiden demo-versioille klikatessani jostain yritti koneelle myös asentua haittaohjelma, joten pieni varovaisuus oli paikallaan.     

I decided to freshen up this little blog of mine with a new layout. Blue is one of the colors I never get bored with, so I decided to go with it and now I am happy with the end result. I didn't know that it is possible to buy a new layout with a small budget before I learned about it in the excellent crochet blog byHaafner. Layout is made by designer Maddie Cline. She was very quick and trustworthy and I can warmly recommend her services if you want to freshen up the layout in your Blogger-blog. Before purchase I also went through many templates from different designers on Etsy, but unfortunately some virus program tried to install itself to my computer when I checked demo versions from some other designers and companies. So I guess it is good to be a bit careful. Maddie also made the changes herself so I didn't have to learn to install the new layout. Simple and safe for me!    


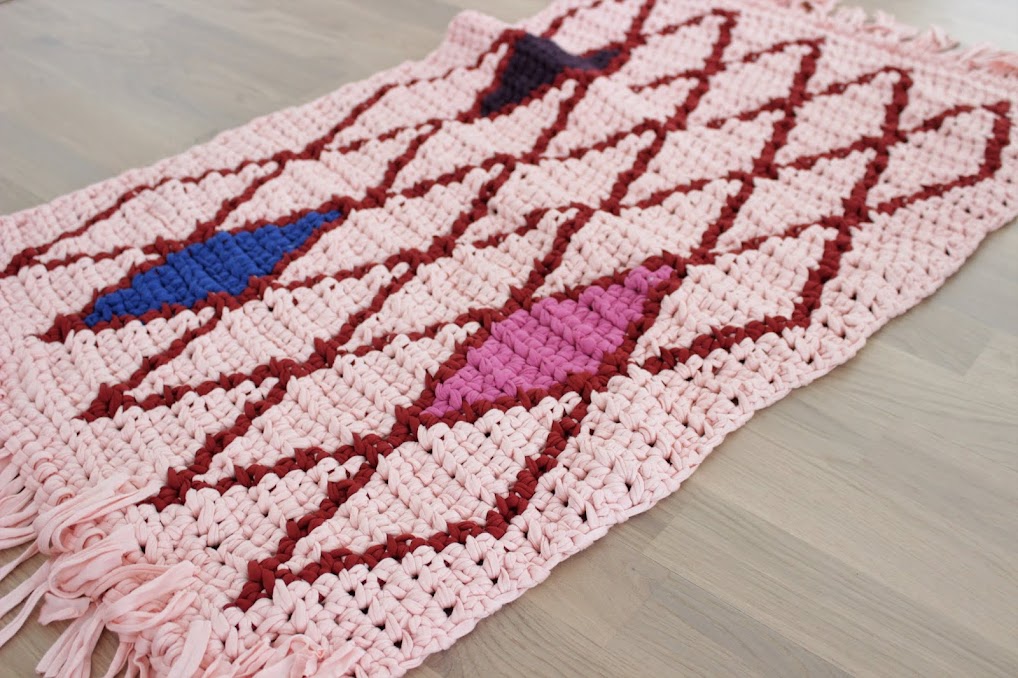
Samalla pari kuvaa timanttien koristamasta viirinauhasta. Nämä on siis tehty peruskuviota varioimalla ja ilmainen ohje peruskuviollehan on ladattavissa Ravelry-kaupassani. Lankana käytin Schachenmayrin Cataniaa ja koukkua 2,5. 

At the same time a couple of pics of a crocheted bunting with diamonds and different variations of the basic diamond pattern. Free pattern for the basic pattern can be found on Ravelry in my shop. Yarn is Schachenmayr Catania and I used hook size 2.5.

Mukavaa syyskuista viikkoa toivotellen, / Wishing you a lovely September week,

Pirjo

maanantai 14. syyskuuta 2015

This and that


Some pictures and projects from the last weeks, this and that. A-L from blog Bewitched fingers has kindly remembered me with Liebster Award. Here are my answers to the 11 questions that followed with the award. Unfortunately I am really bad at sending these awards forward and I have the feeling that this award has been going around in blogs a lot already. So I thought to only answer the questions I got. 

1. Which craft project are you most proud of?

Well, I don't actually know, but maybe a knitted sweater I made some years ago and which you see in one of the pictures above - or the color work part of it. Each round of the color work took an hour to knit and the instruction was not very clear so all the decreases had to be counted at the same time as following the pattern. I am also pretty proud of Lenni and Laila. And I am happy that I figured out the technique for diamonds with clear lines of course - and all the other patterns you can create with the same technique. 

2. Do you have any favorite pattern?

It is difficult to name just one, and I don't often follow any pattern even though I love to buy patterns. I just never seem to have time to try them even though there are so many patterns by wonderful designers out there. Creating and exploring by myself is just my way of crocheting. But I would love to crochet and knit more projects with patterns from others, and I know I have a lot to learn as well. I just have to take some more time for that. Above you see one wonderful book I have been looking at lately, by Anna Wilkinson. The book contains many lovely cardigan patterns, a type of crochet project I have not yet had the courage to try. I also admire for example the work of Danish designer Jeanette from Lutter Idyl. She is just such a skilled, versatile crocheter and designer, and has a modern take on crochet (and I hope to get her new book in my hands soon).

3. Your best memory from craft class at school?

Oh dear, this is a tough one as well. Probably a pair of leg warmers with fair isle pattern I knitted at the age of 14-15? I used them many years. So it was all about pattern and color for me already back then, if I now start to think about it.

4. And your worst?

My first knitted cardigan with color work, I guess I was also 14 when I knitted that. I had made a big mistake in one of the patterns in the middle of the cardigan :-). And I don't think I was actually pleased with most of the projects from the time because I just didn't have the same patience to learn and finish projects than now. 

5. Why did you start blogging?

Needed something new, back in 2009 after having a hard time at work. I tried to think what I liked to do as a child and found crafting. So I started this blog and started learning and reviving skills in crochet and knitting. I remember how proud I was when I managed to crochet my first basket and how lovely it was to make and create something very concrete compared to work. It is a bit sad that I seldom feel the same accomplishment nowadays even though I often like the outcome of what I make. When creating your own projects and patterns, the process of making is a lot longer of course as well, starting from choosing the yarn and hook for a project. And this process is sometimes frustrating and the joy disappears on the way. Then I just leave the project there and pick it up later again. In this post you see pics of my crochet projects from lately and each and one of these are still a bit under construction, or the first versions. I am for example going to use the arrow pattern for another project. 

6. Where would you like to travel?

There are so many places, but here are a few: Azores, Halifax in Canada (and to stay a few days in Iceland on the way), Lisbon, Gothenburg and Aarhus. Above you also see one place I like visiting, one of the beautiful houses in the little town of Lund (part of museum Kulturen), taken almost exactly one year ago. I have also studied in Lund one semester at the university ages ago and wouldn't mind living there again for some time. I think it is an inspiring little city and near Copenhagen as well.

7. What kind of a cook are you?

I am most often busy with crafting and crocheting so I prefer that in my free time :-) . I bake more than cook, simple and quick things, like bread rolls, apple pies and blueberry pies. I like to bake without too many kitchen appliances and without hurry. Baking is as much about enjoyment for different senses as about the end result. I like to feel the dough in my hands, to smell the lovely scent at home. I also like to use ecological products as much as possible. When it comes to cooking I just often make salads, soups, pizza and sometimes some Indian flavors and often fish in different ways. 

8. Chocolate cake or cheesecake

Chocolate cake. One of the simple baking projects I like is kladdkaka, the Swedish version of mudcake.

9. Favorite month?

I like autumn time as probably many of us crocheters and knitters, but every month has its good sides (maybe November excluded). I try to go out for walks in the nature and every time there is something to admire and to discover during every season.

10. Which song is playing in your head at the moment?


11. Do you have any other hobbies than craft related?

Nothing regular. I read some, but very irregularly. Last fall I took a couple of courses in ceramics and would love to learn more, and to make my own plates and cups with pottery wheel. Hopefully someday. I am a home person and interested in interior design as well.

Well, I guess this was more than enough about me.  

Wishing you a good week!
Pirjo
keskiviikko 2. syyskuuta 2015

Pattern for a crocheted "diamond bracelet" ;-)


I guess these diamonds have been my best friend lately, to loan the classic song singed by Marilyn Monroe in the film Gentlemen Prefer Blondes. And because friendship should be shared, here comes a little pattern for crocheting friendship diamond bracelets. And who wouldn’t want to wear “a diamond bracelet” or what :-). 

I think this is a pretty quick project and it is also good for using all those bits and pieces of yarn. And you can also easily crochet a longer ribbon as well with this pattern if you want to make a hat strap, belt or maybe handles for a bag. Bracelets in these pictures are crocheted with different cotton and alpaca yarns suitable for hook sizes 2 and 2,5. Brands I have used are Hjertegarn Cotton 8, Hjertegarn Alpaca silk, Schachenmayr Catania and a Finnish yarn Novita Kotiväki. I would recommend to use cotton yarn for this project though, because it is often easier to crochet than for example alpaca yarn when working with several colors at the same time. When it comes to choosing color, I recommend bright colors for pattern color. You want your diamonds to be seen of course :-).

A few words about the technique I have used in the pattern. I recommend you to first take a look at the basic pattern for crocheting diamonds which you can download on Ravelry. In this tapestry crochet technique you work back and forth normally on both sides and all the stitches are crocheted into both loops. Stitches are crocheted with half double crochets (hdc) and widening the diamond and decreasing the width are made one stitch at a time each row with changing the color. Stitches are never added or decreased in this technique, because the pattern follows the natural stitch pattern of half double crochet, so the only thing changing is the color. You see a chart for two different kind of bracelets below. I hope that these also help you on the way. The chart shows the right side of the work, but helps you to crochet the wrong side as well. When it comes to the basic pattern on the left side, there are three diamonds in the chart, but I have often crocheted four to make the bracelet go round my wrist as you for example see in the picture next to the chart. 

When crocheting tapestry crochet, you always carry along the resting yarn inside the stitch. When switching color, make the final yarn over with the new color. When working these diamonds carry along the resting yarn during each stitch when crocheting the right side of the work. When crocheting the wrong side, don’t carry the resting yarn inside the first stitch after the color change but pick it up after that. This little trick gives diamonds clearer lines. 


I also have the habit of doing so that I make one hdc into the same stitch as ch 2 at the beginning of each row (see the picture on the left side below). At the end of the row I jump over the last hdc of the previous row and make the last hdc to ch 2 of the previous row instead (see the picture on the right side below). I think this way the edges are quite pretty and even, but I know there are other ways as well of course (look for example for tutorials on YouTube). 


Abbreviations (US crochet terms)

sl st               slip stitch
ch                  chain
hdc                half double crochet (half treble in UK)

I also use terms background color (green) and motif color (white) in this pattern. This pattern is written for right-handed crocheters and the chart is for right-handed as well, but if you are left-handed and have difficulties with crocheting the pattern, take contact so I try to help you (I am left-handed too).  

1. Chain 7 + 2 (or 9 + 2 if you want to make the broader bracelet).

2. (Right side of the work) Crochet 1 hdc into third chain from the hook. Crochet 1 hdc into each ch = 7 hdc /9 hdc. So ch 2 in the beginning is not counted as one hdc. Chain 2 and turn the work.

3.-4. Crochet 1 hdc into each stitch and end the row with ch 2 (as at the end of each row during the whole work) and turn the work. Here you can also crochet two more rows with the background color to leave more space for a button. 

5. (Wrong side of the work) Time to join in a new color and start crocheting the pattern according the little chart above. Start from them bottom right corner of the chart. As you see there are half squares at the end of each row, and these mark ch 2 that you have to do at the beginning of each row. Here below I have also written how to crochet the few first rounds to make the pattern hopefully easier to crochet.

So, during this first row with two colors, crochet first 2 hdc with the background color, and when doing the 3rd hdc, make the last yarn over with the motif color. Below pictures hopefully show how to do with the yarns during this row. Remember to lift the yarn of the background color to the wrong side of the work before taking the motif color on the hook, and do this always on the wrong side. As you see an arrow also points to the yarn in the first picture below. Crochet 1 hdc with motif color, but make the last yarn over with the background color (second picture below). Leave the motif color here and crochet rest of the round with only background color (third picture below).


6. On the right side crochet 2 hdc with the background color and then 2 hdc with the motif color, and then 3 hdc with the background color according the chart. Remember to carry the background color inside the motif color during both stitches. 

7. (Wrong side) Crochet 2 hdc with background color, 3 hdc with the motif color and 2 hdc with the background color. When crocheting the first stitch with the motif color, remember to lift the yarn to the wrong side (first picture below), then crochet the first stitch without carrying the yarn inside the motif color (second picture below). 


Continue as before the next two rows. The diamond is now 5 stitches wide and during the following row start decreasing the width of the diamond with one stitch from five to four on the right side of the work. Below you see a picture where you see that right-handed crocheter make decreases to the left side of the diamond (and left-handed to the right side). 
   

After finishing the first diamond, crochet one row with the background color before starting the next diamond. When it comes to motif color I have just simply left it to the last stitch of the previous diamond, and then picked it up on the hook again (as you see below), but there are different ways here as well - you can for example cut the yarn of motif color or crochet it inside just one stitch in the middle of the row during the row between diamonds etc. 


After crocheting the pattern, crochet the amount of rows you want with the background color. I have usually crocheted three rows if I have crocheted 5 rows in the beginning. You can also crochet around the bracelet with slip stitches or single stitches. I have done so with almost every bracelet and during the round have also made the loop for a button with 9-10 chain stitches. You may of course want to make another amount of rows in the beginning and in the end than I have done.

Hope you enjoy the pattern and have fun when crocheting your own bracelet! And don't hesitate to ask if you have any questions or problems. I have been crocheting these diamonds for a year and a half now, and I crochet them automatically, so I am a bit nervous if I have remembered to tell all the important steps. I am also not yet sure how precisely I should explain the basic technique in individual patterns because the basic pattern is also separately available for free. I would be very glad to hear your opinion. Remember also that this pattern is for your personal pleasure only. Wishing you a lovely September!


Tällä kertaa siis ainoastaan enlanninkielinen postaus ja ohje virkatuille timanttirannekoruille selkeyden takia, tässä ohjeessa kun on tekstimassaa yhdelläkin kielellä jo ihan riittävästi :-). Jos kaipaat suomenkielistä ohjetta tai jokin on siinä mielestäsi epäselvää niin jätäthän kommenttia. Perusohje näille timanteillehan löytyy Ravelrysta myös suomen kielellä. Virkkausiloa syyskuulle toivotellen,


Pirjo